Test Setup: Start/Stop
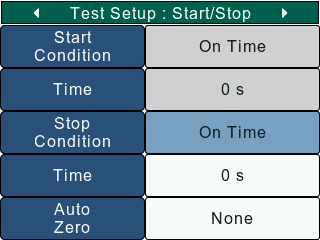
The Test Setup: Start/Stop screen lets to user setup the test Start and Stop conditions.
From the Home screen, press and hold the Settings key for 2 seconds to load the Configuration screen. Navigate to the Test Setup option and press the Select key to load the Test Setup screen. Use the Left/Right key to navigate to the Test Setup: Start/Stop screen.
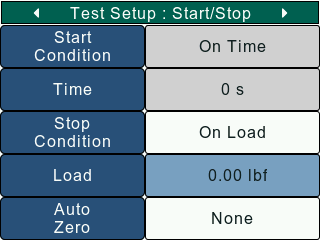
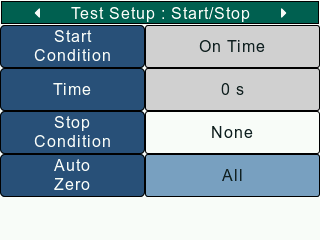
The Test Setup: Start/Stopscreen can be used to set the following parameters –
Stop Condition
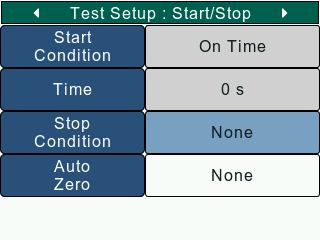
The Stop condition setting lets the user select the condition that will trigger a test to stop. This condition is valid only when the test is started from the gauge i.e. by pressing the F1 Button on the Home screen. Irrespective of the Stop Condition, the test can be stopped from the Home screen by pressing the F1 button.
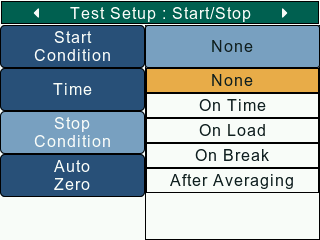
On the Test Setup: Start/Stop screen, use the Navigation keys to set the cursor on the Stop condition setting. To change the Stop condition, press the Select key to open a list with available stop conditions. The available stop conditions will depend on the results that have been enabled in Test Setup: Configure screen.
If the Stop condition is set to 'None', the test will stop only when the user manually presses the F1 Button on the Home screen.
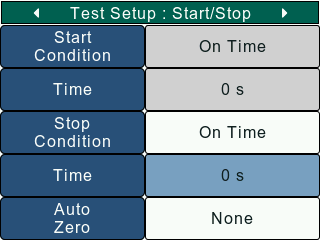
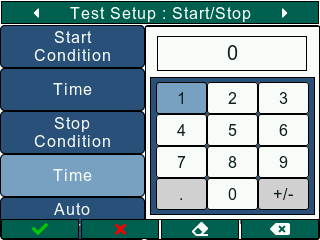
If the Stop condition is set to 'On Time', the user gets to set the test duration. The stop timer is visible on the Home screen indicating the time left in seconds. The user can enter a value between 0 - 3600 s as the stop duration.
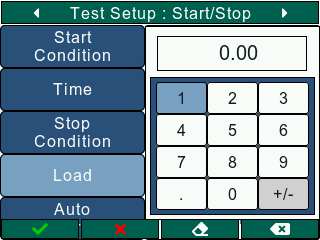
If the Stop condition is set to 'On Load', the user gets to set a load value, upon reaching which the test stops. The load value set by the user must be less than the maximum gauge capacity.
Stop Condition 'After Averaging' is available only if Load Averaging is enabled in Test Setup: Configure screen. In this case, the test stops once load averaging is completed.

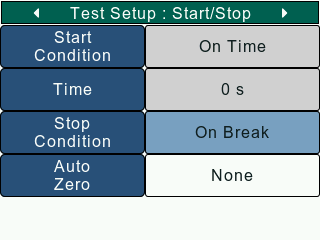
Stop Condition 'On Break' is available only if Break Detection is enabled in Test Setup: Configure screen. This option is available only in the DFS Series gauges. In this case, the test stops once break is detected.
The user will have to exit the Configuration screen and save changes for the Stop Condition to change.
Auto Zero
The Auto Zero setting automatically zeroes the selected values when a test is started. Once this is set, the user won't have to manual zero the values before starting the test. Auto Zero can be disabled by selecting the 'None' option. Selecting the 'All' option Zeros Reasults as well as Load reading.
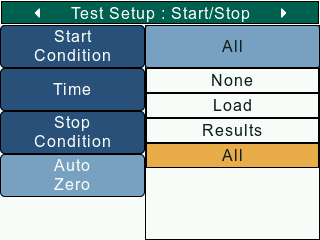
On the Test Setup: Start/Stop screen, use the Navigation keys to set the cursor on the Lock Home setting. To change the Auto Zero setting, press the Select key to open a list with available options. The user will have to exit the Configuration screen and save changes for the Auto Zero setting to change.